RSS Feed


May 14, 2011
 |
| Inspiration Bag - visit her blog! |
 | |
| My finished bag |
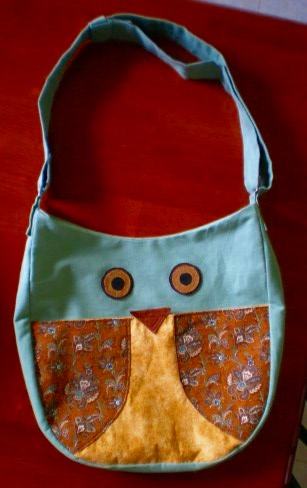
I bought buttons to use for eyes, but they turned out to be too small. (No one likes a beady eyed owl.) An image search for owl eyes turned up beautiful amber stares, but I couldn't get any fabrics that worked properly without seeming too weird. Eventually I found the right golden shade in my own stash to use as eyes, but it took a lot of tries. I then decided that it would be a good idea to use four layers of fabric: black, brown, gold, and black to define the eyes properly. It's REALLY hard to cut out a cloth circle! Eventually I used iron-on interfacing, after failing twice to come home with the right double stick iron on whatever it is I needed. Yes, I glued the eyes together and on the bag. If they fall off, glue them back on, please?
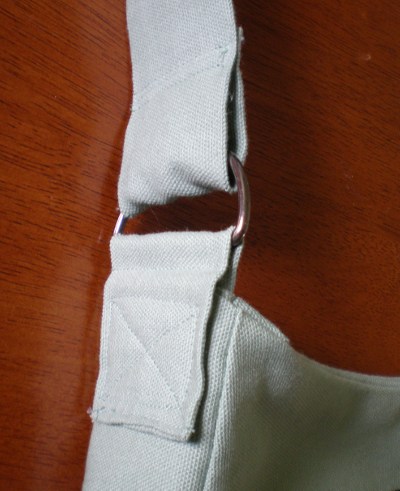
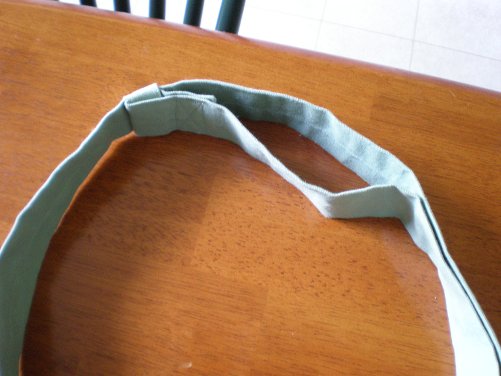
I made a few changes to the original pattern. I separated the front panel, wings and body, to make into a pocket. The body fabric was folded in half and cut out, with interfacing on one side for added strength. Pull on his beak and it opens! I also altered the inside of the bag, making the top three inches of it the same fabric as the outside. (The rest is a soft tan colored fabric. Possibly challis?) For the strap, I used D-rings, and found a tutorial at Sew Loquacious that allowed me to make a fabric slide so the strap can be adjustable. I couldn't find the right kind of metal part to do this, at least, not big enough. If it doesn't work well it will be really easy to undo.
The instructions were excellent and I had no problems with assembly. I drew out the owl on oversized paper and then drew all the parts on separate pieces so I wouldn't have to cut it apart. I added a seam allowance, just in case.
 |
| Owl Bag, Jr. |
Fun, fun project! Now I'm experiencing a small bag-making addiction and making plans for two or three others.
Subscribe to:
Post Comments (Atom)
0 comments:
Post a Comment