RSS Feed


 Posts
All Comments
Posts
All Comments
April 20, 2012
 |
| I would not have shaped the room this way. |
 |
| This was the inspiration for the colors (no horizontal lines, though). |
For some reason, the room's theme just screamed 'adventure' to me. I'm not even sure if that's the right word, but I'm trying very hard to meet those needs. I'm still trying to figure that out. I want it to be unlike the rest of the house (or maybe the rest of the house more like it). It's a place to go to escape, to imagine, to relax and think about all the awesome books and National Geographic Magazines you ever read, and the exotic and wonderful places you want to someday visit. It's a place to dream your best dreams that have nothing to do with your everyday life. It doesn't matter if you do them or not, it's enough to just think about them.
 |
| This is actually the 'after' photo, added to this post later. |
.jpg)
But what else? It needs an elephant, somehow, somewhere. I need to do SOMETHING to the curtains to make them look more exciting. I'd love to be able to put stuff up in the spot above the closet, but since that requires a full size ladder to reach, I'd have to plan carefully. A parasol would be awesome, and maybe a travel trunk. I'll likely display my Steampunk library in here if I ever get it done. I do need a clock in here still, and maybe a small lantern. Maybe I can find something at Novica? Or World Market?
Adventure is just around the corner, and to the front of the house.
April 19, 2012
I love this crochet pattern, I can finish it in two evenings, or maybe 6 hours.
This one is for intended for my pending niece, so I thought I'd get all decorative on it. I tried to include decorations that were soft and (hopefully) won't pull off easily. I suppose I should test that beforehand . . .

The yarn is Simply Caron's bamboo yarn. It's SOOO very soft, and I love the color. my main complaint is that it unravels easily and you struggle to get all the tiny threads onto the hook at times. I found the pattern for the flowers here, and while I'm still mastering the magic loop (I get confused because I'm left handed, and I feel like I'm doing it backwards), I pull the beginning thread when I'm done, and pop! flower! I tried out various yarn widths and the thinner ones worked the best. The ribbon will get lots of adjusting, or maybe even removed. That's up to my sister!
April 12, 2012
My mother told me about a recipe she tried using just a box of cake mix and a 12 oz can of soda. Creativity sparked, and I decided to try it out with my microwave cake recipe and see what happened. Turned out exactly like the previous recipe! Here it is:
Microwave Soda Cake
2 TBSP flour
1.5 TBSP sugar
1/4 tsp baking powder
1/8 tsp salt
2 TBSP soda or diet soda of your choice.
Mix together and microwave for 1 minute. Surprise! Cake!

I used Fanta Strawberry soda, which explains the pinkness. If I get strawberries I might try cutting one up and adding it to the mix. I saw suggestions of using cream soda and am all about trying that next. Don't forget to sprinkle chocolate chips as frosting as soon as you take it out!
Update: If you want a moister cake, add 3 tbsps instead of 2, and microwave for 1 minute and 15-20 seconds.
April 7, 2012
Here's a link to my Steampunk Clockwork doll stop-motion animation.
http://www.youtube.com/watch?v=60tx1S9631w
March 29, 2012

The program I ended up using is called Frames. It didn't crash on me every step of the way, like Windows Movie Maker or MonkeyJam, and it didn't force me to lay every single picture on a different track, like Wax. Plus I had options to control exactly how long every frame was, and could easily apply them to each frame. The only thing this program was missing was a fade-to-black option for the transitions and an option for fading audio. They had a large range of options for exporting to video, which got me all kinds of varying results. I finally just kept playing with the expert mode until I produced a clear video with decent audio. Fortunately they offer a full feature 30 day trial, and my project is due April 10.
I think this is the most exciting thing I've ever done in college.
March 28, 2012

With the doll finished, I'm now ready to attempt to make an animation of her. This involves quite a bit of experimenting and learning new things!
The first thing, of course, was to build a 'stage.' I ended up pulling out a lightbox kit my dad had given me ages ago and discovered it was plenty big enough to use with my Obitsu. I've got a fairly good setup, if a bit plain, although I'm learning how best to use it for this project with the good old-fashioned 'make changes til it works' approach. lighting is SO difficult, yet so important with photography. I know natural sunlight is best but have no interest in adding natural elements to the chaos. Of course, it's set up in front of a big window so who knows what kind of effect that's having on it? Now that I've gotten most of the shadows out of the way I may add some props.
I also have to become a choreographer. I'm not very good at that, but I'll do my best. I need to know where I'm going to move her, and how many positions to have her in. At this point I don't really know how long it will take for her to accomplish each pose, but I'm aiming for 30 seconds to a minute of animation. I've plotted out a little dance for her to do. If it's too short I can lengthen it. I suppose, since she's a 'clockwork doll,' I can just rerun the sequence again if I need to.
I did a test run earlier, a simple spin, to see how much I need to actually move her in order to get a smooth animation. The doll has magnets in her feet and has a circular piece of metal that serves as a stand. In that stand is a small hole. I'm really not sure why, but it gives me an excellent point of reference. I drew on the 'stage' (a disused melamine bookshelf) a circle the size of the stand so that I will always know where to put the doll back to keep her in position. Around that circle I made marks, (hopefully) evenly spaced, so I could line up the hole in the stand with each mark for turns. I suppose I ought to figure out a way to keep the stand in place so I can rotate her, but this will work for now. The pencil marks are not visible on the stage. The full spin appears to take 2 seconds at 24 frames per second.
I have got SO many photos on my hard drive right now, and I haven't started on the main project yet!
March 21, 2012
I think I've got everything on her that I wanted, except maybe the key. It's really not that important.
I need to get lots of lighting lighting, find the tripod, and make a checklist of things I need to look at before taking a photo, like the tendency of her skirt to poof up on the one side, or of her corset to slide down. Overall I'm pleased with how she looks. It was not at ALL what I envisioned when I bought my Obitsu, but she definitely has charm.


March 13, 2012

Getting down to finishing touches. You should always use a mirror and/or take a photo so you can see where you need to make corrections. Fortunately you can barely see all the brush strokes. I'm always in too much of a hurry to thin down the paint. Even if I do, as with the cheek coloring, I spend ages reworking it to get it right.
March 8, 2012

This is my second attempt at hair, there may be a third. The first time I thought, "I should make her hair look carved to make it look more like a doll." So I made an attempt with air-drying clay. I used the Crayola brand, but found it frustrating because it was very puffy. It was like trying to flatten and carve a marshmallow. I did manage a reasonable attempt, but it tore in a few places as it dried and shrunk. So I decided to stick with what I know and pulled out the viscose. I sewed in beads all throughout the bun, but you can only see three in the photo. Frustrating. I've also got the usual amount of wisps everywhere and will eventually work up the courage to water those down. I don't think I can get away with hair spray. I just hope I used enough glue! With the previous incarnations of my Obitsu I made wigs on top of cling wrap so it would be removable, but decided not to bother here.
On her arms are some stickers I obtained from the scrapbooking section of Michaels a while back for mini book-making. I wanted to see if they showed up properly in the photo without being overly shiny, for a decorative effect. It sort of works, but I'm not sure if I like it yet. I also used teeny round stickers on the other arm to make it look like hinges or screws. There are round depressions in the doll's arm at those places anyway, I thought I'd highlight them using stickers rather than my gold pen. It feels a little weird to be attempting to make a doll appear LESS lifelike!
March 7, 2012
Here is the latest update.

I made a slight change to the corset, namely the fastening in the back. I gave up on the corset lacing as I found it too frustrating to adjust and readjust. Instead, I scavenged the velcro from a Barbie dress, and sewed them on the corset. One half I put facing out, half on the fabric, half sticking out. The other I put facing in, totally underneath the fabric with a slight fabric overhang. it fits together cleanly so that the corset edges meet, although I have to do some fussing at the top still. I could fake corset lacing on ribbon or a piece of the corset fabric and then glue that over top if I change my mind. Because it's a plastic, articulated doll, I really want to be sure the clothing is removable.
I also made her slippers. I used a pinkish doll skin cut in a thick U shape and some lace pieces. I cut out a piece of paper to the size of her foot and glued the fabric to that. I didn't put a sole on as I was concerned too many layers of fabric would interfere with the magnet strength.
I learned some time ago that unless you're a REALLY good dancer, you shouldn't wear brightly colored shoes, as it will attract attention to the feet. I did not want this particular doll to have any foot attention. She has small, bland feet whose only worth is the awesomely strong magnets that hold her upright. She also can't really stand on her toes or bend her foot anywhere but at the ankle, something I don't want people to notice in the animation. I'll have to wait for daylight to try to get a good photo - the flash keeps washing them out.
March 4, 2012
Following a bizarre chain of events, I find myself completely remaking my 1/6 scale Obitsu doll into a clockwork dancer for a stop-motion animation project for school.
I've had a terrible time dressing my Obitsu because I never really liked the premade clothes for her (that I could find), and Barbie clothes rarely fit properly. Patterns are minimal. Plus, having mainly only worked in 1/12 scale, I was reluctant to take on a sewing project for a 'bigger' doll!
 |
| Corset in progress |
The clockwork doll project has totally taken off in a wild 'must finish' ride that has me struggling to keep up and to STOP and do something useful once in a while. I'm now on version 2 of each part of her outfit and kept thinking 'I should record this so I can post a tutorial online!' So here it is. This post details the most complicated piece - the corset. The skirts are basically circles with an X in the center.
My instructions aren't exact, as every doll is different, and your mental ideas for corsets will vary. I am detailing what I did, and a few techniques to simplify the process. You should be able to apply these to any doll.
What you'll need:
Fabric and matching thread
fabric glue (I use Aleene's tacky glue)
needle and pins
pencil/fabric pen
Iron and ironing board
paper and measuring tape (optional)
lightweight iron-on fabric interfacing
 1. Step one, of course, is to determine what style of corset you want for your doll, and create the pattern. I designed mine to stop just below the bust and to fall to a center point. I also curved it high enough so that it went up and around the doll's hips, so as not to hinder leg movement. The corset turned out to be 4" wide and roughly 2" high for my 27cm Obitsu. To get a symmetrical pattern, I folded the paper in half before cutting along the lines.
2. Next is determining dart placement. Don't fear the dart. They will work wonders in getting the fabric to hit the curves nicely. Your central darts should fall in line with the nipple, princess style, so line everything up and draw equivalent lines on your pattern. I also draw a small horizontal slash across the center so I know where the center is and roughly how far away to sew. After you have these first two lines established, add more, evenly spaced around the corset. I had four total, but now I think six would be better. I left a quarter inch space between the edge and the end of the dart.
3. Next, I transferred my pattern onto a lightweight piece of interfacing and cut it out. I simply cut out my paper pattern and traced around it directly on the interfacing. (Make sure you know which side has the glue and draw on the OTHER side.) The important part here is getting the darts right, as you'll use these lines to sew them in.
P.S. if you are using leather you can skip these interfacing directions. But you're kind of on your own for how well your darts come out, as I haven't tried to make them with leather.
4. Next, iron your piece of corset fabric and then iron on the interfacing, according to package directions. I find it easier to cut the fabric to shape after ironing it on.

5. Once the interfacing is ironed on, carefully cut out your fabric, adding a quarter inch seam allowance or slightly less around the interfacing. Here you want to fold the fabric over along the edges of the interfacing, and you can glue or sew the edges down. Carefully ironing the fold down can help before gluing/sewing.

-- A helpful tip - start with the corners first, folding at a 45 degree angle, and tack those down. You can sort of see I've already done the top line in the picture. then you can fold each edge down carefully, and you end up with a neat, mitred corner. Here's a simple tutorial if you want a better explanation. --
For the bottom, make straight cuts in the curved areas, up to the edge of the interfacing. This will help ease the fabric neatly into the curves. For the point, cut fabric away from it. You may have to go ahead and glue part of it down first and then cut away the excess.
Now, if you've been gluing, let it dry.
6. Next, sewing darts!

Take your corset piece and fold it in half along one of the dart lines. Starting at one end, sew small stitches, slowly getting farther away from the folded edge, until you get to the center, and then head back to the edge for the other end of the line, and tie off. My dart shouldn't be quite so curved, but it still works. Repeat for each dart. Your corset will start curving in on itself, but that's good.
 Once you've finished the darts, it's time to decorate your corset! I glued Bunka trim along the bottom edge. It's a nice little bit of detail. You may be most familiar with Bunka as the corded material tassels are made of. It's rare to find yards of it in typical craft shops, I have better luck shopping online. However, buying a premade tassel of the right color will probably provide plenty of material for a small project like this. Other fun things you can do is add lace or beads or ribbon.
 To make my bodice, I layered a strip of brown tulle and the orange fabric, sewed a tube long enough to go around her body, and then gathered it in the center. To attach it the corset, I simply tacked it along the edge of the top of the corset.
|
| Use a slightly heavier weight interfacing to reduce sagging. My fabric choice was really delicate, but I didn't have a heavier interfacing handy. |
Your corset is ready to wear! Next we get to lacing.
7. For this part, I used heavy duty button thread by Coats and Clark. It's thicker than normal thread, but still easy to sew with. I used black because it was what I had on hand, I'm not actually sure if it comes in other colors.
This will feel a bit awkward, but it works. Use TWO needles, one at each end of your thread. Determine the middle of your thread, and then, moving from the inside out, draw one end through one side of the fabric, and the other end through the other. Pull to make sure the center of the thread is in the center of the two corset ends. Use your Obitsu's arms to help hold the corset still while you're working.

Next, you'll switch sides, going from the outside in, in an X. Take care that your thread ends stay untangled and you're threading in a downward motion. You'll figure this out pretty quick as you're doing it. Repeat all the way down.
What you also need to be careful of is that your holes are spaced evenly, in line on each side. Otherwise your corset will end up crooked. Fortunately it's easy to redo, as I had to do after taking this photo.
Once at the bottom, you can tie in a bow. Don't cut the excess thread until you're certain you won't need to take the corset off again! Otherwise leave the threads long so you can loose the corset enough to take it off the doll without having to unthread the entire thing.
I hope you found this quick tutorial useful! Contact me if you have any questions.
February 16, 2012
I explored a few ideas today in regards to making fake mini books. Well, faker than the mini books I've been making. I guess I'm making mini spines?


The shaping appears to be a must, which is easy enough to do with a nail file. Painting them looks ok, although I need to look up how make a fake leather look. They definitely need a coat of gesso or something else to make them shiny. It turned out to be very frustrating to attempt to glue the paper to the rounded strip, but it IS possible.
I can get 8 book spines from a single coffee stirrer. This saves me a ton of money because I think I paid maybe $10 for that box of stirrers ages ago, and it seems to be neverending. It would certainly save space. However, I'm not so sure it would save me any time, especially if I have to fuss over getting paper around the curves. I can't seem to find any half rounds narrow enough for the project, so I'll have to round off each stirrer. I may also try gluing a narrower strip of cardstock or some other thick substance - string, maybe? - to the center of the stirrer to force the paper to curve without having to sand. I suppose if I do the painting and shellacking before cutting it would be, if not quicker, at least less messy.
I'm not actually sure if I've accomplished anything yet. I haven't figured out if I want to glue the spines to a block to make them booklike, or just glue them to a flat panel made to look like a bookcase. I suppose it depends on how consistently I can cut them to size.
February 13, 2012
After a long break, my interest cycle has revolved back to miniatures. I'm STILL pondering the making of mini books and the steampunk library. It dawned on me that I had a perfect vessel already - a jewelry box I got at Bombay Company that I no longer use. I'm not sure that it would be big enough for what I'm envisioning, and it's still at my parent's house, so I need to go get it and measure.
I'm also feeling a bit overwhelmed by the number of books I need to make. Today I cut up two strips of balsa wood, and estimated that from each 1/8" thickness strip, 24" long, I can get about 3" worth of bookshelf space filled, roughly 38 books. If shelves are 1" tall, and maybe 6" wide, that's 56 books per shelf. If the bookshelf is about 10" tall, that's 560 books. and there's two bookshelves on each end, and a much wider one on the back wall. Maybe 2,000 books total. And that's just for one project!
There are kits I can buy that usually have about 50 or 60 books in them, about $13 apiece. The Kendall leather book kit is around $19, but only has 20 books in that kit, but the leather paper is so awesome it's almost worth it. And then there's the plain pre-made books that are 12 books for around $2.50. Wanna in El Paso is also planning a new printable book kit soon, by the page rather than by the title.
I suppose my best bet is to just do spine blocks, but that sounds just as complex as making each book individually. I know nothing about wood carving, and yet in order to obtain the right amount of realism I think I'd have to learn. I can always tell the fake books, and I'd be easily disappointed.
I'm sure I could cut it down to 1000 books by just doing a corner of shelves rather than the entire roombox. Maybe less if I incorporate architectural details. I need to start thinking about the rest of the room and how to make it Victorian steampunk without going overboard. I'm the snooty type who thinks if there's going to be gears in it, it had better be functional.
January 12, 2012
I started off the New Year by attacking the kitchen. I packed away glassware we never used, extracted pots and pans that SHOULDN'T be used, and added some wire shelving to increase storage in random places. I keep hoping that one day I'll magically create enough room for a crock pot, bread machine, and a super-fancy mixer.
One of the things I had the most problems finding room for was the rolling pin. It was too big for any of the drawers, and is such an odd shape that it just got in the way anywhere I stuck it. We kept it in the narrow cabinet with the pans and cutting boards, but it took up a lot of room.
So I decided I should hang it. It took a while to figure out how. I was excited when I realized that it had a hole for hanging in one handle, but the length of string required to make it hang evenly against the wall made it too long to hang in any of the cabinets, or even on the outside of any of the cabinets. We had tiled the entire wall between the countertop and the cabinets, and there was no way I was going to attempt drilling through them. (I doubt they're stuck on very well as it is.) The only answer appeared to be UNDER the cabinets, horizontally. It's out of the way, not taking up any useable space.

I ended up using basic small screw eyes and ribbon, into the narrow strip of wood under the cabinet against the wall. They were small enough that I could have gone through the bottom of the cabinet, but opted for the wall, just in case. The ribbon is just long enough that I can slide the rolling pin in and out of it, but short enough that it shouldn't slide out on its own. I wandered through Sears Hardware contemplating every possibility, including bike rack hooks and PVC pipe, but in the end, I feel this was the simplest and best option. I use my rolling pin for breads, pizza crusts, and tortillas a fair bit due to Brian's soy allergies, so having it close at hand without having to dig it out from under cutting boards and causing avalanches will be nice.
Now that I have a full size house to decorate, I've spent a lot of time climbing up and down ladders, stools and chairs, hanging things. My workout is tripled by the fact that I frequently need to retrieve a different tool, which, of course, is in the tool box. On the floor. Over there.
I finally decided I should invest in a tool belt and just carry everything up with me at once. I would need something that would hold a small level, my B&D power drill, a tape measure, a pencil, nails/screws/drill bits and other hanging accessories, regular screwdrivers, possibly drywall filler, and a possibly a hammer.
And then I ran into a new problem. Tool belts are big, heavy, leather monstrosities designed to take a lot of abuse and be worn by men twice my size. They even come with attachments for certain types of tools, which delighted me, but I didn't feel I could justify the cost. None of them seemed to be quite right for what I needed to carry up. So I looked at women's tool belts and immediately began my WHY DOES EVERYTHING DESIGNED FOR WOMEN HAVE TO BE PINK????! rant. It's not just the oh-they're-so-cute patronization. It's the realization that the designer obviously puts form before function, and if so, then while the belt looks 'pretty', in as much as poorly dyed pink leather can look, it's probably not as well made as the ones designed for men. I REALLY don't want my hammer to fall on my foot!
Obviously my next option is to make my own. I do have some heavy duty canvas that would work, I just need to figure out a design. Maybe invest in a riveter. Hmm.
December 16, 2011
I saw this on Pinterest this year, and couldn't resist making them. The original instructions can be found on the Magic Bean blog. I made a few alterations as detailed below. But first: pictures!


I used photos of family members to make my silhouettes, and was lucky enough to find sticky-backed felt with a protective paper backing onto which I could draw the outlines. I had to track down carbon paper. Do you know how hard it is to find carbon paper these days? I glued fabric onto cardboard instead of sewing, because the trim I wanted to use wasn't easily sewable.
They were an instant hit. Now I want a set for MY tree. However, I think that I'll make mine out of scrapbooking paper. It might go over a little easier! I'm going to see if I can borrow a Cricut and cut the cutting job in half.
December 15, 2011

That's right. The space between our front door and the glass security door gets hot enough to melt fake Christmas wreaths. I am appalled and amused, and now wondering what would happen if I were to string bacon there on a sunny day.
I am also ready to tackle the unique challenge of figuring out what I can safely decorate my front door with! Any suggestions?

Here's a before photo. Apparently I hung it on the front door upside down? Oops.

October 27, 2011
Soon after getting into my yarn hobby I realized I needed better storage for my tools, so I started looking around for ideas. I wasn't really pleased with what I saw. I didn't want a fabric rollup needle case, it just didn't seem secure enough to me. I wanted everything in one container. And by everything I meant crochet hooks, knitting needles, all the various accessories and tools, and instructions. Everything but the yarn, in fact. And right now, I think I have it.
What I bought:
A Mead Five Star zippered 3 ring binder. It has two mesh zippered pockets, one inside and one outside. There is an accordion style pocket thing on the inside left that is for loose papers, with about 3 compartments. It's big, big enough for my ever so slightly oversized Leisure Arts books.
What's inside:
Rubbermaid Magazine holders. These are narrow strips of plastic with 3 ring binder spaced holes and a long slot. You slip your magazine or booklet through the slot and it can now be held in place in the rings. It wasn't big enough for the oversized booklets, but those can sit nicely in the back.
A 3 ring binder folder, for loose instructions that I don't feel like hole punching.
A small pair of scissors for cutting yarn.
A retractable tape measure.
A pencil.
What it holds:
I'm still new to the hobby, and I'm trying very hard to behave and only buy tools as I need them. I did buy a 'learn to knit' kit which came with quite a few items.
Front pocket:
A stitch counter
some plastic rings that I assume are stitch markers but I haven't figured out how to use them yet
yarn needles
A knitting gauge
a stitch holder
a cable needle
retractable tape measure
tatting shuttle (yes, I DID mean everything)
my custom made row reminders (I made these when I was knitting my first scarf and repeating four rows over and over. I kept forgetting where I stopped and found it difficult to tell by looking at it. Basically they look like plastic bread tags. I took white fun foam and cut small rectangles, and then cut an X in one half of the rectangle. I wrote a number on the other half. The needle slides through the X (it also worked pretty well to keep the yarn from sliding off!). I picked the number of the row I stopped at and slid it on when I was done. Saved me a lot of confusion!)
Inside:
Two pairs of knitting needles, sizes 6 and 8
scissors
pen
Inside zippered pocket:
two sets of circular needles
set of double pointed needles
Accordion Pocket:
Crochet Hook Board
I made this, too. I bought the Crochet Guy's hook set, and it came with the weirdest hook case I've ever seen. I can only guess how it was supposed to work. I did like how the hooks were held in place by elastic, but the stupid thing was held closed by VELCRO. Let's think about this. Yarn. Velcro. Yarn. Velcro. THIS IS NOT A GOOD COMBINATION! It's disaster waiting to strike. So I took some heavy cardboard (actually the board you put behind cross stitch when you want to frame it, very rigid stuff) and made a fabric slipcover for it, onto which I sewed my own strips of elastic. I stitched enough tiny pockets for each crochet hook (about 16!) and it pops neatly into the accordion folder. If the accordion pocket hadn't been there, I would have made the slipcover wider, and sewn appropriately spaced buttonholes into the edge to slip it onto the rings. I don't expect to get any more crochet hooks, but I can easily make similar ones for future knitting needles.
The only thing I couldn't fit in the case was the paper towel tube I reserved for making center pull yarn balls. I haven't even tried it yet, so it may not work at all. I'm going to try to find a smaller hollow tube that can fit inside the rings.
Overall, I'm pleased. It's a bit heavy, but I've got everything I need in there except the yarn.
October 11, 2011
I took a break from yarn to acknowledge the season. I wanted a little bit of Fall color for the house, and had a wooden basket, and found some pretty flowers half off at Michaels, and got this:

The basket in itself is awesome. Brian's Grandpa Leitner made it. It collapses flat! And as far as I can tell, it's only three pieces. The handle, the narrow base that runs underneath, and the basket part, cut in a spiral that acts like one of those travel cups. The handle pivots so the whole thing becomes a flat piece which can be tucked away when not in use. I don't understand why it works, and I'm afraid to ask in case it stops working.
The autumn colors really make the wood pop, and it goes really well with the soft cream in the living room, where I have on display the other arrangement because I bought way too many fake flowers for this little basket! I was glad to finally come up with an idea, though. I wanted to display it so much, and leaving it empty didn't feel right. Most flower arrangements seem to be vertical, so I was at a loss for ideas. I didn't want to put fake fruit in it, although cherries or small berries might be interesting, or round red beads. Acorns might have worked, too. I still have plenty of time to fuss with it - I can already see a few spots that need some extra attention.
September 16, 2011


Ta da! No no, not the camera, the sweater! (in future years, historians will look at all these photos of people holding cameras and wonder, 'what the heck?' and then create complex theories regarding them.) Anyway. I only got 1 non-blurry shot before my camera battery died again. Naturally I'll post more later. I haven't washed or blocked it yet, but I'll get to that eventually. This sweater DEMANDED to be finished. The best part is, if I decide the sleeves are too short, I can add a few more rows!

September 15, 2011
So the fall semester starts, and I'm on the downward spiral towards graduation, with my dreaded 499 writing intensive course present and lurking. So what do I do? Take up crochet!
Growing up, my mother tried with varying degrees of success to teach me to crochet. Her being right handed, and me left handed, we usually only ended up confusing each other. Eventually I got the hang of it, but never was willing or felt able to progress behind the basics. Until this month.
This is why the Internet is so wonderful. There are instructions and how-to videos everywhere, for lefties, righties, and probably amputees. And patterns! It takes forever to decide which ones to do first, not where to find them! I have been in a crochet nirvana, and grateful to have something to do with my mind and hands that isn't a computer screen.
I am currently working on a sweater. This Chevron Lace Cardigan, in fact, but mine is a dark blue. So far, it looks nothing like the picture, and I have the feeling it never will. But, I had to start somewhere, and it's easy to destroy the evidence. Just pull!
August 28, 2011
 | |
| Easy yellow cake in a cup! |
My miniatures group has been discussing microwave cake for a while now, but this is the first time I tried it. You can use a microwave safe mug or a ramekin. I used a bouillon bowl, because that's all I could find in the store. It's kind of like a small soup bowl. The cake ends up about two inches high in this bowl.
Here are my two favorite recipes. I didn't bother mixing in a separate bowl or using cooking spray, and it didn't seem to make any difference. I also ate it directly out of the bowl. Be careful when removing - it will be HOT and you're going to have to WAIT. Good luck. I sprinkle chocolate chips across the top right after removing it from the microwave. It melts quickly and acts as frosting.
Single Serving Microwave Chocolate Cake
(source: http://allthingsholdtogether.com/blog/2009/09/24/single-serving-microwave-cake-recipe/)
Ingredients:
2 TBSP flour
1.5 TBSP sugar
1/2 tsp baking powder
1 T unsweetened cocoa powder
A pinch of salt
2 TBSP milk
1/2 tsp vanilla
1 tsp oil
Directions:
Mix all of the ingredients together in a small bowl. Microwave on high for 1 minute.
Single Serving Microwave Yellow Cake:
(source: http://recipes.sparkpeople.com/recipe-detail.asp?recipe=1035841)
Ingredients:
2 TBSP flour
1.5 TBSP sugar
1/4 tsp baking powder
1/8 tsp salt
2 TBSP milk
3/4 TBSP oil
1/4 tsp vanilla extract
Directions:
Mix ingredients together and microwave on high for 1 minute.
August 23, 2011
There I was, shopping in Walmart. I needed a dish pan, because filling up our cavernous sink is a chore. I wanted to try the ammonia and ziploc bag technique to clean our burners, and maybe a pan. I wanted a cheap pitcher, and to look at storage for the craft room.
Walmart was all screwed up due to reconstruction. Temporary entrance, all the windows boarded up, everything all over the place. Plus they had recently rearranged all the aisles, so nothing was where it should be, and the ceilings seemed to be much higher and farther away. I felt very disoriented. Walmart's previous layout had been logical, and made sense. Now it didn't!
I was looking at ziploc bags, trying to figure out what size they actually were, when the shelf started shaking and I heard something rumbling. Must be doing something weird with their construction. Funny, I didn't see any equipment big enough to make that noise. Huh. Still shaking and wobbling. Harder. Is someone moving the shelf? obnoxious kids? Stop moving, shelf. *touches it*. Still shaking and rumbling. Earthquake? No, Can't be. Could it? and then my common sense started yelling at me.
WHATAREYOUDOINGYYOUCANTSTOPABIGSHELFFROMFALLINGOVERANDITMIGHTSOGETOUTOFTHEAISLENOW!
I hurried out of the aisle into a wide open space, and soon the shaking slowed down and stopped. Walked back a few paces. A wide eyed lady asks me,"was that an earthquake?" I said, "No! we don't get those here!" I went back to looking at ziploc bags, but by that time thought, screw it, go home. Then the lady came back, carrying her phone. "It WAS an earthquake! Everybody's talking about it!" THEN the Walmart employees began combing the aisles, telling us to leave the store so they could check for damage. So I dropped the dish tub and the bags and left. All sorts of cranky old women were yelling at the employees to let them check out up front. We heard a little bit of a beeping warning, but no real alarm. Kinda sad.
I went to my car and started making calls and listening to the radio, along with everybody else, then went home and checked the house over carefully. A broom had fallen over, and a plastic LED candle in the guest room. Yay for the house being sturdier than we thought!
My mom was fine, and had my grandmother and nephew with her. One aunt had to rush down 12 flights of stairs, my sister had to deal with 5. My cousin slept through it all, or was driving and didn't notice. totally surreal.
August 11, 2011
 I thought perhaps if I gave Robin a new set of shoes (considering the condition of the old pair) she might relax a little. I found that working with cloth to make shoes turned out to be a bit better than working with leather, but as you can see, I'm still terrible at getting glue everywhere. that's the bad thing about the macro setting on my camera! I don't see the glue at all when I look at them!
 The soles are made from white fun foam, the rest from plain old red cotton. I trimmed with red and white bunka. They come off!
It was very easy to do.
Step 1. Trace around her feet onto white cardboard or whatever heavy thin material you happen to have handy. Not too thick. Cut out.
Step 2. Trace THOSE patterns onto fun foam. Felt or leather could work, too, but I was gooing for a thick shoe base.
Step 3. Cut out a circle about an inch in diameter using your desired shoe fabric.
Step 4. Cut that circle neatly in half. This will make the toes of the shoe.
Step 5. Cut out two strips of fabric about a quarter of an inch wide and about two inches long.
Step 6. Using the cardboard foot pattern for this step. I placed a sole against the bottom of each foot and then wrapped the fabric around her foot to make the desired shape. Glue the fabric to the bottom of the sole (the side opposite her feet). The long strips go around her heel, and the half-circle goes over her toes, straight edge closer to her ankles. Trim as necessary.
Step 7. Glue the fun foam sole to the bottom of her shoe. This hides the glued edges.
Step 8. Trim with bunka around the edges, or wherever you want to decorate the shoe.I ran red bunka around the open edge of the shoe, and white around the sole to add texture to the base and hide the glued tucked under edges.

I'd say make sure you don't glue the shoe to the doll, but really, with this plastic doll, it'd be easy to remove if necessary. You might find it easier to apply small bits of glue with a toothpick or similar to prevent the mess I made.
I'm hoping the other dolls won't make cracks about ruby slippers and falling houses.
August 7, 2011
My shoemaking skills have not improved, but at least I got something that will work, and minimizes his duck feet. Robin may get a new pair of shoes, as the current pair don't seem to be holding up too well.
 | |
| "Now THAT's a knife!" |
Oh, sweet Netflix.
August 6, 2011
 This is another Heidi Ott doll, one of the early generation dollhouse dolls. (I've seen the later ones. I want them.) It's probably pointless to say that he's been in my stash a while. ALL of my dolls have been in my stash a while at this point.
 His story is bizarre, possibly because I was watching Highlander at the time I acquired him. Netflix reruns, anyway. Yep, that's right. Robin and her team disinterred him in the underbelly of a church. It took a while to convince her that it wasn't an elaborate prank, he really was buried there at the end of the 19th century. Now he's trying to learn about the 21st century and basically driving Robin nuts.
Modern styles are difficult to do, and it's hard to find patterns that would transfer well to this scale. I struggled and futzed and this is the current result. I want to redo the shirt because I had problems with the cuffs, and I need to redo the vest because I got lazy and used too much glue. For this doll I had to sit and think about what a man might wear in the 21st century if he were accustomed to Victorian/Edwardian fashion, yet wanted to fit in with modern casual society without compromising TOO much.
I consider this a trial run. Now that I know what works for the look I want, I plan to make up a pattern and post it. Most Ott dolls look like they're simply drowning in cloth, and this strikes me as unfair. There doesn't seem to be anyone providing patterns or clothing to suit them, and I want to fix that. This style hides his funky hips and hopefully makes him look taller, although it's hard to make a 5.5" doll look tall. (Most male dollhouse dolls come in at 6".)
While I love articulated dolls, they're also hard to dress because you can't take shortcuts, like sewing or gluing cloth directly to the body. I dislike the feet of these dolls because they're short and paddle shaped, making it difficult to produce a shoe that doesn't look like duck feet. (He stole Robin's shoes for the photo. I SUCK at shoe-making. When I get a non-horrible result I'll reshoot.) The new Ott dolls have better feet, and shoes that go along with them, but they're also more expensive. I had to compromise.
August 2, 2011
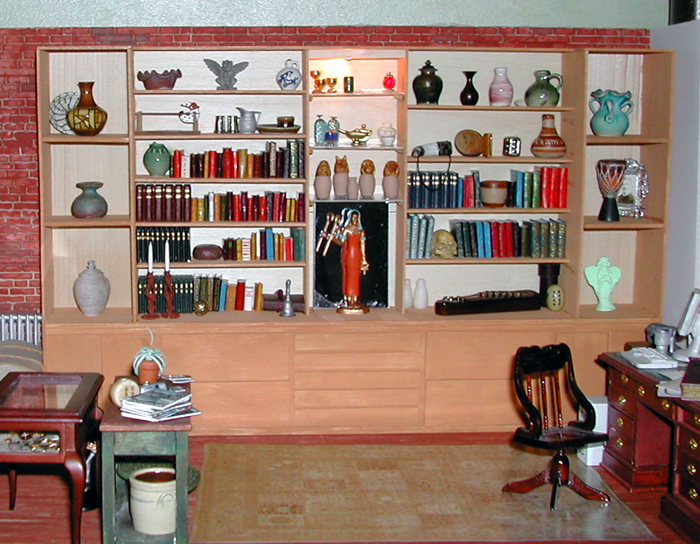
My photos of my Archaeologist's study are actually quite old. Since I moved, they are no longer in the same room, or on the same bookshelf. The bookshelf I did move it to is actually bigger, meaning that not only do I have more space to spread out, but I also HAVE to make changes.
It's looked strange for a while, and finally I decided I needed to make those changes. I wanted to add some architectural details so that it no longer looked like I'd thrown a bunch of random objects on a shelf. I felt the best and easiest way to do this would be to make it a split level room, or possibly add stairs. (I could always add a 'second floor' to the shelf above!) Below is my mock-up of my idea.

I think it will work. I can even hide wiring underneath the platform, although that leads to my next problem. My lighting supplies are a mess. None of the lights I have seem to be appropriate for this modern setting, and the ones I've looked at online just don't seem right. I may just add one of those tiny LED undercabinet bulbs. I need SOME sort of light in there!
I also discovered a chair problem. Like my own house, there's not enough seating, so I dug through my stash and stole a few chairs meant for my neglected Edwardian house. Then I brought Robin over to see if I'd gotten the scale right for the platform. She noticed the new chairs immediately. "Where's my green 1920's chair?" She demanded. "It was perfect in here! why'd you leave it out?" I dug around for it and then finally remembered - I'd given it to Nora. This earned me another rant about giving away her furniture to perfect strangers. Apparently I'd whisked Nora away to the guest room when she arrived, and had never had her with the other dolls. The elves are also in the guest room, but I doubt they'd associate with the likes of her. Fortunately, Robin seems to have forgotten about her new laptop that I'd also given Nora. I brought them all down. maybe Nora would like an MP3 player instead.

July 18, 2011

More books made! The top shelf features books from Treefeathers on the left, and the rest are from one of those big classical literature book kits. The bottom two shelves are all new and handmade. These are not the only books I have made, but are pretty representative of what they look all look like. for the moment I've given up on decorating them and am just covering with papers. I'll make them fancier when I get enough done.
July 3, 2011
"We should go to the Green Valley Book Fair!"
After two years of saying this, we finally went! I had been as a teenager with my family, where we always found something to satisfy our reading habits at a fair price. I certainly wanted to go back!
We made a weekend trip of it, planning out a route, eating places, and other touristy stops.In particular was Luray Caverns and Eidelweiss, a German restaurant in Staunton, VA.
It was a pretty weekend, if a bit hot. We took our time getting there, knowing we had no plans until our 7 pm reservation at Eidelweiss. We stopped for lunch at the West Main Market in Luray, a nice little sandwich shop in an old, old storefront. It was a pretty little town, and very quiet at the time, so we decided to explore a little bit before moving on.
Up the street was Bank Street Books, so I suggested we pop in there. It was a used book store, taking up most of a former house. Nicely organized, very big selection, and . . . owls. Everywhere. Enough to have filled a small shop by itself. There were big owls, little owls, furry owls, wooden owls, pewter owls, cutesy owls, owls that looked like they were going to eat you, overly dramatic owls, and even an owl that made noise when you walked by it. (the proprietor demonstrated it and quickly turned it off again.) Ever since I made those owl bags, I have been encountering owls in my shopping trips and excursions. This was the ultimate. I was rather surprised to find out the rather mundane name of the shop, instead of, say, "The Owlry" or "Wise Old Owl Used Books." Although, you'll notice if you visit the web site, I obviously had the right place. Sadly, the owls were not for sale.
After the book store (I bought a copy of "Peter and the Starcatchers") we headed over towards Luray Caverns. We had been warned in the Market/Deli that there was a bluegrass and mountain music festival going on there this weekend, so we decided we would just go and look and see how bad it was.
It was pretty bad. People parked everywhere, and worst of all, a big crowd congregating outside the building with no shade in sight. Had I known about the festival, I would have made plans to go to that, but I wasn't prepared to deal with outdoors and big crowds. We vetoed it and headed out towards Harrisonburg, where we had hotel reservations at the Sleep Inn.
Eventually I noticed the big Hollywood style sign for Endless Caverns. "We should go there. Or at least see if it's as crowded." So we turned off and drove down a nice long country lane, to eventually come up to a nice, half-empty parking lot in front of a sweet little country style building and old style stone covered walkway to one side. There was one tour left for the day, conducted by a teenager on summer break. It was a nice tour, over an hour, with very little hoopla or crazy gimmicks, just oohing and aaahing over nature and history. The cave had been found and explored and toured since 1879, and as part of the tour they showed how they used to give tours, pointing out natural shelves where candles once stood, or chandeliers hung, as well as Alexander's Ballroom, a large room in the cave that once housed speakeasy parties during Prohibition. Sadly, we missed the bats, who hung out in the woods during the summer where they could get all the mosquitoes they could eat.
Of course, right at the very start of the tour, as we're starting down the deep dark staircase, the strap on my owl bag gave way and my bag went tumbling down the stairs. (I think my bag was jealous that I wanted all those other owls earlier.) Fortunately, nothing fell out and the bag wasn't damaged, but it was a bit embarrassing. I lightened the load of the bag and tied the one end up with a knot. Hopefully this week I'll install the sliding buckle I purchased a few weeks ago for it.
After the cave tour we headed to the Sleep Inn in Harrisonburg. It was a nice little hotel, best of all with free, easy to use wifi. We only stayed long enough to drop off our bags and then headed even further south to Staunton.
Eidelweiss was a cute little log cabinny type restaurant. There was a cat lying flat out on the gravel walkway at the entrance, pretending to be a rug. He didn't move or care about us at all. Inside we found an accordionist with a sense of humor, and varying degrees of waitresses, some in standard waiting outfits, some in German frocks. Our food came very quickly and was pretty typical German fare.
When we left the cat had moved about 3 feet away, still flat out, and flicked the tip of his tail at us in response. We returned to Harrisonburg and collapsed, full of rich German food and lots of cave walking.
The next morning we checked out, stopped for breakfast at Sheetz, and headed to the book fair. Yet another nice little country roads, passing cows. Fortunately, it wasn't very crowded there, so we could park fairly close to the building. I grabbed my big, currently empty NWF bag and we headed in. Two hours later we ambled back out. Only 8 books, but I was struggling with my 'don't buy books you haven't read' stigma. There were, as usual, lots of books there. I remembered the layout, except we went through a different door than usual and so everything felt backwards to me. I felt better once I hit the original entrance and we worked our way back through. The prices were excellent. I don't feel paperbacks should cost more than $5, and very few of them were over that.
We stopped for lunch and to pop in an antique mall in Harrisonburg, and then headed back home, taking Skyline Drive. It's a much better drive in a taller vehicle, but it was nice and leisurely for a Sunday afternoon. We stopped at a few places in Sperryville, drove past my great-uncle's salvage yard outside of Warrenton, (marked by me suddenly yelling, "Oooh, there's Uncle Arthur's place!" And then we were past it, and Brian's saying, "the place with the windows?") We grabbed dinner in Gainesville and just barely beat the thunderstorm home.
It was a nice trip. There were owls, caves, books, and accordion music. What more could you ask for?
P.S. The radio stations down there were much better. This is not fair.
June 26, 2011
Yep. Now I'm on a book-making binge. Finally back to miniatures!
 |
| Needs more books! |
About a year ago I had purchased a leather book kit by Jeanetta Kendall. I had also slowly been collecting scrapbook papers that I thought might make suitable book covers. Then, on Friday, I went to the scrapbooking show with my mother, grandmother, sister, and aunt, where I kind of went a little crazy tracking down appropriate book papers. In all, I think I've spent about $100 on materials. I figured I better justify my madness and actually produce some books!
 | |
| 28 books here, 12 over there, and 900 more to go . . . |
Jeanetta Kendall's book kit is amazing. It comes with super-thin sheets of leather-like paper, printed with gold ink, and three sizes of little wooden blocks to serve as the interior. There are tiny crop marks as guidelines on the 'leather', and you can use either scissors or an Xacto knife to cut out each book binding. I painted the edges of the blocks with gold, and used Aleene's tacky glue to paste the binding to the block. Everything fit perfectly, I had no problems, even when messy me got glue on the outside of the book. Wiped right off! Since I used an Xacto knife to cut them out, I still have plenty of leftover 'leather' to cover other books with - particularly if I make smaller ones.
I purchased balsa wood to use for book interiors, but the quality hasn't been that great. Since we just got a new set of unwanted yellow and white pages dropped off, I thought I would use the white pages to cut and make up my own interiors. It might be a bit more work, but hopefully it will add some extra realism.
I'm not against buying books. I'd like to buy one of each at Treefeathers, if only she had that option! I just need to be careful and get books that are properly in scale - so many look too big! I also want to design my own, particularly the spines. I can pull lots of covers off the internet, but not so much the spines, which is generally all you get to see of a book on a shelf, anyway. Maybe I should just take a camera in to a library or bookshop and photograph those.
Yes, I have a book issues. There are books in every room in the house, and I think there should be more. Lone books just look so sad, they need lots of friends!
June 9, 2011
Local Neighborhood Information for Centreville, Chantilly and Fairfax County, Virginia Provided by Spencer Marker
I'm hopping up and down inside.
I grew up in Herndon, where the historical society is very active and vociferous. I had the opportunity to work with them in my position at the local TV station, and so got to know Herndon history very well. Yes, it was a hokey little dairy town on the W&OD railroad, but people lived there and influenced other's lives.
When I moved to Centreville, I was a little disappointed at the dearth of historic information. I managed to dredge up a 1970's book on Centreville from, of all places, GMUs library. I fortunately had a professor who lived in one of Centreville's few historic houses, and provided me with a lot of information on the area.
I began a summer internship with Fairfax County Park Authority last week, where I will be cleaning up their document and photograph section in the computer database. The transfer from paper to PC was not exactly successful. Since I have OCD tendencies towards organization, and I can beat any computer into submission, I feel this position is right up my alley. History AND Computers!
Sadly, the computer I was slated to use was abruptly upgraded before I began work, and the database program has not yet been installed!
In the meantime, I've been acquainting myself with the paper database and some of the original documents and photos. Each item has an accompanying work sheet detailing the information about it. The items are in archival safe boxes, sorted by location, and assigned its own archive number. The work sheets are in numeric order in binders according to whether it's a photo or a document or the dreaded 'miscellaneous.' From what I saw before the upgrade, the computer just has the assigned numbers, and may or may not have any detail information.
I thought I would begin by creating a spreadsheet of the work sheet information, so all I would have to do is copy and paste into the database program once it's installed, after checking that the item matches the number and the work sheet description. This means I get to read lots of descriptions of photographs of local places, some of them unfamiliar.
I've taken to conducting a little internet research and adding that information to the description so that I have a better idea of what an item is. So far I've corrected a mislabeled church, added the name of a park to a description just labeled 'battle monument' (and learned why Monument Drive in Fairfax is CALLED Monument Drive!), and added pertinent information to archived newspaper articles. (title, author, publication, date! c'mon, that's important!)
I also discovered a few extra historic sites in Centreville, such as listed the website posted above, and other websites like http://www.novahistory.org/index.shtml and http://www.fairfaxcounty.gov/parks/GMP/MG_CLRPRV_CH2TXT.pdf
I haven't yet seen the pictures to these descriptions yet, and hope that I'll be proved correct. I'm having a blast and I haven't even gotten started!
June 5, 2011
The first movie is still the best. This one lacked the energy, although I do admire the historical details.
The premise is a race to the Fountain of Youth, stopping to collect all the items needed to make it work. I sense a video game in the future. The racers? Edward Teach, aka Blackbeard, for whom Sparrow worked under duress, our old friend Barbossa, now sporting a pegleg and technically working under the English Crown as a privateer, and some Spanish prince. We never really learn anything about him, except he's snooty and holier-than-thou.
I was pleased with the first appearance of Blackbeard. A solid, rough looking man, with burning fuses tied into his great beard, glaring fiercely at his mutinous crew. Excellent entrance. And then . . . he pulled out his magic sword.
Now, I have nothing against swords. I LIKE swords. And magic. Magic rocks. For a historical pirate adventure movie, a little bit of magic and a little bit of swords is perfectly acceptable. Voodoo and other beliefs were/are present in the Caribbean, and there's no reason they shouldn't be in these movies. I mean, after all, they are looking for an epic fountain! This magic sword, however, was just too much. It was jarring. He could control the entire ship and everything on it with it, performing complicated rope tying and etc with a wave. Certainly, I can accept cursed coins. They did one simple thing: prevent the holder from dying until it was returned to its home. Jack Sparrow's compass? It too, did one simple thing - point toward the holder's heart's desire. This sword? It probably baked bread and made coffee while it was adjusting the sails. It begged the question: if he had that sword, which performed necessary ship tasks quicker and more efficiently than the losers below decks, WHY DID HE NEED A CREW?
That's the other thing. My main answer for the crew's presence is to use them in close combat. However, Blackbeard's ship, The Queen Anne's Revenge, was equipped with . . . wait for it . . . FLAMETHROWERS. That's right. Two of 'em, tucked in the bow of the ship. I'd like you to pause and think about 18th century sailing vessels. What are they made of? What are they covered in? What do they carry when they're looking for a fight? Wood, you say? Tar and swaths of cloth, yes? Gunpowder, right? Things that catch fire easily? Is having flamethrowers in the FRONT of a hard-to-steer wooden and tar-covered ship carrying gunpowder REALLY a good idea? No.
I calmly accepted mermaids, zombies, fountains that granted immortality, voodoo dolls, compasses that that pointed to heart's desires, and even actual shrunken ships in bottles. I could not get my head around that sword, and refused to accept the flamethrowers.
It was fun if you're looking for lots of action and a simple plot. Sam Claflin was hot. Jack's complex escape from King George Vernon Dursley's chamber was highly amusing. I'm sure I'll add it to the collection.
Subscribe to:
Posts (Atom)