RSS Feed


 Posts
All Comments
Posts
All Comments
June 7, 2015
I'm not sure how I found out about this, but probably a random Internet search for local Steampunk events. It was in a town we were interested in visiting, on our anniversary, and Steampunk themed. We mutually agreed to do it.


My outfit is still pretty basic. I'm going for Steampunk Lady Explorer. The skirt is a 25 yard skirt commonly used in belly dancing. The awesome ladies at Tribe Nawaar were demonstrating how to tuck it up and 'bustle' it at AnomalyCon, and I fell in love. The natural collor turned out to be a bit thin, so I had to add an underskirt to it, but the more layers, the better!
The corset is a red chenille 'wench' underbust from Damsel in this Dress. I made the peasant blouse, and found the cropped jacket at a thrift shop. The hat is from Patterns of Time, and while a little big on me, is really the best part of my costume. It's also really nice to wear when walking around in sunshine!

B. wore his awesome new vest from Pendragon Costumes with basic pants, shirt, vest, and newsboy cap.
The Leadville event included a 2 hour historic train ride up the the mountain and back. Wonderfully scenic! We had a great time at the Museum party, and hope they'll do it again next year!


May 25, 2015

Remember that disappointingly small kitchen faucet I bought from miniatures.com?
I searched for a ridiculously long amount of time for a replacement. I even scoured Shapeways.com in the hopes that I could possibly get one 3D printed. I even downloaded Sketchup with the idea of creating my own design to print. Three hours of frustrating work with a program that kept freezing finally convinced me to stop wasting my time and turn to some time honored polymer clay to get the job done.

My inspiration? My own Kohler faucet. It's a good faucet. It has a pull out sprayer feature, a handle that can be easily accessed by both left and right hands, and a good height for tall pots. Why wouldn't I want it in my dollhouse? And making the thing only took me about two hours. Nothing compared to the amount of time I spent shopping and fussing with 3D printing.


It'll be easiest to see it through the window.

I like the height. I'll have to get Robin a stock pot just to show off its height feature. I also like how it nearly reaches the middle of the sink. I suppose I could have made it a little longer that way, but this looks adequate.

Here's Robin for 'human' scale. She actually makes it look a little on the small side, but nowhere near as bad as the previous faucet!

Here's the Farrow faucet I originally purchased. Doesn't it look ridiculously small? Can you imagine trying to turn on that little handle? It looks like a soap dispenser, or a drinking water dispenser here. Perhaps I'll keep it for that.

Here's a distance view. I much prefer the bigger faucet here. It says, 'here is a serious kitchen faucet. Stuff gets washed here.' (Don't worry, that unfinished spot is where the dishwasher door goes.)
 |
| Why? |
One more necessary item I can check off my to do list!
May 24, 2015
I got my pot lights hooked up! I'm a little disappointed, actually. They're not as bright as I hoped, and so the kitchen has a soft, deserted, late night feel. The photo, of course, doesn't show this.

Here's a reminder of what it looks like on the other side. I painted the plastic with white nail polish to make them brighter.


May 9, 2015
Where did she go? What happened? Did she give up?
No, she got a job, and has been desperately playing real life catch-up.
But it was raining, and raining, and raining, and my motivation wavered horribly. I sent a whiny email to The Camp about not having time to make anything anymore. So of course today I perversely sat down and made something.

A mess! Well, a mess would have been interesting. Instead, I made a ceiling, which is likely something you will never notice if you ever see the house in person. There's more details to add for this, I just need to get some more shiny sided poster board and figure out the trim around the lights.
I raved about beautiful decorative ceilings in a previous dollhouse post, but a 20th or 21st century kitchen doesn't have that kind of detailing, unless it's a really expensive house. When was the last time you looked at your kitchen ceiling? Do you even know if you have pot lights, or how many there are? I didn't think so.

The ceiling is illustration board, with circles awkwardly cut out. The pot lights are blister bubbles from some random expired medicine I found while digging through my cabinet. I added 3/16" strip wood around the edges for a minor drop down ceiling so I had room for the wiring to run.
And the wiring? Ooh, the wiring. I got that from Evans Designs. Four LED lights hooked up to a single transistor. I used 2 sets, and I 'should' be able to attach them to my dollhouse tape runs, no problem. There was plenty of space on these for me to spread them out, and I was even able to drop one of them down so it will light up below the microwave. The bulbs were a little over an eighth of an inch wide, and the transistor exactly 1/8" thick.
Since the ceiling is so big, and I wanted to test and make sure it would run ok without hooking it up to the main house wiring, I had bought a junction splice so I could make a temporary testing board. I was rather shocked when I discovered that my lead-in wire didn't fit in it! So now this project is on hold again, but at least I've made a little more progress.
I'm fairly certain that Judy Ryden's blog inspired me, or simply did what I was wanting to do first, so I'm giving her credit here. She's the only one I've found forging pathways for DIY LED lighting in dollhouses, and has some fantastic tips and tutorials.
February 7, 2015
I haven't done a lot of crochet this past year, and it's all the fault of an afghan.
I get much colder at night than B., so I have a throw for my side of the bed. It's a basic no-sew, fringed and tied end fleece blanket that I've had for ages. It went much better in my previous bedroom with its rustic style. It looks downright silly on a Chippendale four-poster.
 |
| My book doesn't actually look like this. |
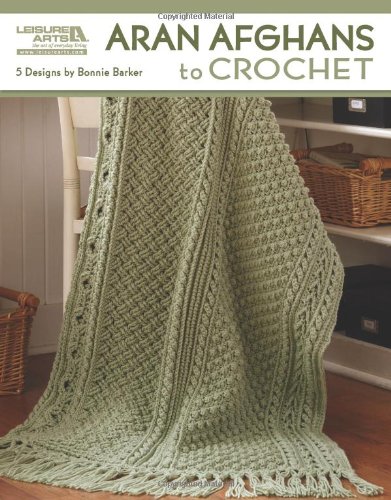
I particularly liked this book for the way it gave instructions. It would specifically label sections, i.e. (cable row) so you could conceivably combine different stitches and make up your own pattern.
I went with the Basketweave afghan, although I initially bought it for the Sampler afghan. Sewing together sections of crocheted yarn is annoying, so I moved on.
I'm terrible when it comes to reading crochet instructions all the way through. I figure if I don't know a stitch, it will take me five minutes to look it up and figure out how to do it.
 |
| Really, I should have stopped here. |
About this time B. got interested in the project. He liked the look of it. He suggested that I make it big enough to cover the bed. The big, huge, king sized bed that comes up to my waist and is fondly referred to as the Monster Bed. I resisted, but he kept suggesting, and so I modified my pattern again. I bought more yarn. Then even more. I had to wait and ransack various Walmarts because they generally only carried 4-6 at a time, and apparently the had exclusive selling rights on that particular color, because it was the only place I could find it.
The afghan got bigger. And heavier. And harder to maneuver. Eventually I stopped working on it, because I'd had a molar removed and was exhausted and achy and recovering slowly, and it was just too hard to deal with. Plus the weather was getting warmer and I was sitting under a ridiculous amount of yarn.
I didn't attempt to start any other projects during the year because 'I still had that afghan to finish.' (I did knit a few hats.) Finally in January I hauled it back out, and finished it in early February 2014.

 |
| That center panel is an example of the 'Celtic Weave' |


When I was a foot from the end, I came to the horrible realization that the celtic weave panels had really messed up my stitch count. Yes, that's another bad crochet habit I have, not double checking how many stitches are in a row, but when you have to count up to 241, you don't want to do it often. Fortunately I was able to tug it all straight for the photo! You can also see it isn't long enough to cover the foot of the bed, but that's because it wasn't meant to when I started it. I don't like fringe, and I really don't want to have to come up with an additional panel, so I'm just going to call it done.
You want to know the stats now, don't you? I haven't measured it, but I did manage to make it hang down to the side rails on the bed, so it's at least 110" wide. I lost count early on of how many skeins I used. So after taking these pictures, I was crawling around on the bed for a good half hour, searching carefully for where I had woven in a new skein to the old and tying bits of red thread around the spot. I came up with 36 skeins. That's roughly 9,000 yards, or 27,000 feet of yarn. Each skein is roughly 5 ounces, so the whole things weighs a touch over eleven pounds.
It's nice and warm, and I no longer have to move it, or really look at it. And eventually I will find a bedspread for underneath it that I like and actually fits properly, and get a dust ruffle made, since one can't be had for a decent quality and price.
In the meantime, I'm going back to hats and scarves and amigurumi and other stuff that travels easily, or at least can be carried up and down the stairs without issue . . .
February 3, 2015
Well, didn't that month just fly by! Things got a little crazy, and very little crafting got done. Why?
We attacked the kitchen. It was time.
Here's the kitchen from the online listing, right before we moved in.
 |
| Before! |
 |
| The island didn't stand a chance. |
Then we went appliance shopping. As best we could tell, the appliances that came with the house have been there since it was first built, and all almond colored. I personally didn't care so much about the color, so long as they worked right, but the dishwasher was on its last legs and oozing muck and not cleaning dishes properly. The stovetop had two settings, 'not hot enough' and 'BURN.' The microwave was a spare one B. had bought during his brief time working in Charlotte, was underpowered and tiny, and taking up space on the counter. The counter? In surprisingly good shape for laminate, but we were missing our black granite countertops from the townhouse.
 The sink? Surprisingly not almond, but I was also missing the huge, deep composite sink with the combo faucet/pull out sprayer we'd had in the townhouse. I freely admit I do not understand double bowled sinks even after looking up hand washing methods for dishes. It was not my style. I wanted to be able to lay my Pyrex dishes flat to scrub them! Fortunately this was apparently THE time to replace stuff, and we got some really good deals on the appliances we picked out.
The sink? Surprisingly not almond, but I was also missing the huge, deep composite sink with the combo faucet/pull out sprayer we'd had in the townhouse. I freely admit I do not understand double bowled sinks even after looking up hand washing methods for dishes. It was not my style. I wanted to be able to lay my Pyrex dishes flat to scrub them! Fortunately this was apparently THE time to replace stuff, and we got some really good deals on the appliances we picked out. 
 We'd contacted contractors before and had dismal success in getting them to commit to installing gas lines and range hood vents that vented outside. These were things that needed to be done before we replaced the electric range with a gas range, and ultimately the reason it took us so long to get to the renovation. This time, contractors showed up, gave reasonable estimates, and then did not fall off the face of the Earth, but came back and got the work done WITHIN A WEEK. It was shocking, and we found ourselves rushing to keep up. We actually had to beg the granite people to come later, because we had appliance deliveries the same day they wanted to arrive!
 We had to eat out a lot in the end, which is not fun when there's not a lot of allergy safe places to eat. I think the people at Mumtaz know us by name now!

 We also decided to rearrange some of the drawers, and I took the opportunity to add some little-used items to the donation box. I am still attempting to find new homes for some items. I also took the opportunity to replace all the brass knobs with some silver colored ones, which seemed to go well with all the grey in the granite.
It's now February, and the chaos is still ongoing. The new granite is about 1/4" thinner than the old laminate counters, which means the appliance garage now has a 1/4" gap between the counter and the cabinet above. I am working on fixing that with wood strips, but having issues with matching the stain. Eventually we will have to replace the backsplash because of the thinner counter issue, but right now it will do. Meantime, I have boxes in the dining room with stuff that belong in corner cabinets.
 |
| The new granite counters go well with both the cabinets and the appliances, but this irritates my desire for uniformity. |
There is still more to do, of course. We have yet to address the lighting issue, and as you can see from the first photo, it's a big, ugly one. I have holes to fill and grout to clean and a backsplash to design and install, or have installed. Since we made the island countertop bigger, we may end up adding brackets to help support where it sticks out over the one end. There are things I need to learn to ignore and not scrub at endlessly, as in the picture to the left. The towel hanger is more frustrating than useful. The pantry is ridiculously designed. It's a four foot wide pantry with a two foot door smack in the center. We want to rip out that door and install two double doors so we can easily reach everything in the pantry instead of having to shuffle items in and out of the way to get to things on the edges. We're exhausted so I think those projects are going to get put off for a bit.
Hopefully now I can focus on some smaller projects I had started before I realized the kitchen was actually happening!
Hopefully now I can focus on some smaller projects I had started before I realized the kitchen was actually happening!
Subscribe to:
Posts (Atom)