RSS Feed


 Posts
All Comments
Posts
All Comments
August 22, 2012
I came up with a little trick yesterday that made hemming pants easier for me.
I always had a hard time trying to figure out just how the fabric should be folded in order for the blind hem stitch to work. I knew it had to go a certain way, but folded the fabric in all sorts of directions before I got it right. I would pin it one way, fold around, pin it another way, remeasure, adjust, repin . . .
Eventually I was able to streamline the process a bit so that I no longer had to place and move pins repeatedly. I realize more experienced sewers are laughing at me, or know an even better method, but they weren't there sharing, so I figured this out the hard way and I'm going to write it down so I'll remember!

Step 1. Figure out how much you need to take up the hem. (In order for these pants to fit right, I need to fold them up ___ inches.). Pin here if you need to, but only enough to determine desired pant/skirt length and measure the amount you want to shorten the garment. (this is the 'Length of Hem' in the photo.)
Step 2. Figure out how high up you want your hem stitches to be from the desired new hem of the fabric. (I want my stitches to be ___ inch(es) above the edge of the fabric.)
Step 3. (I use my sewing gauge for this, mainly because it is awesome and I use it for everything.) on the INSIDE of your pant leg (or skirt), measure the amount you determined in Step 1, with that number on the outer edge.
Step 4. Now, fold the fabric of your pants up over the gauge until you reach the number determined in Step 2, and then fold back so a kind of pleat is created. Pin the fold down.
Step 5. Repeat all the way around the fabric. You're all set for stitching! You can trim off the excess here (all except for about half an inch at least to sew on). I prefer to trim after I'm satisfied that I haven't made any horrible measuring mistakes.
Step 6. Set up your machine to do a blind hem stitch according to directions. You will be sewing along the edge of that fold, with the fold on the right. (see photo.)
Step 8. When you finish sewing, flip the new hem to its proper position, and double check that it falls where you want it to before trimming off the excess. I suppose you could also opt to sew a zigzag along the excess before trimming to prevent unraveling. Press well!
August 20, 2012
After seeing a few sewing machines with very large platforms surrounding them, and seeing them in use, I had a major case of extension table envy. Everything's so neat and flat and glides so smoothly! I wanted one, but talking to the Husqvarna rep (did you know certain types of sewing machines have dealers?) revealed a price range of over $100 for varying sizes. Nope. Couldn't justify it. Want. Too expensive Want. It's just a flat piece of plexiglass with some markings on it! Whine. Wait, does it HAVE to be plexiglass?
My special stash of super-nice cardboard from Brian's diploma frame packaging slips into the front of my brain. "Makkkeee onnnneee" that increasingly large, encouraging, DIY portion of my mind whispers.
OK.

It's exactly what you think it is. Super dense, durable cardboard, Dollar Tree contact paper, and some temporary drafting tape with lines drawn on it until I can come up with a better idea. I used glue, a pencil, a metal ruler, and a boxcutter.
The complicated part was sizing it to the machine, but I was able to pull off the surround (I don't know its technical name, but it includes the compartment where you stash the extra bobbins and feet), and turned it upside down and drew around the hole on a piece of paper.
 |
| View of the underside. |
Update: 1/25/2013 - This has proven to be quite sturdy for sewing. Sometimes it slides a bit out of place but that is easily remedied. I also have developed the bad habit of using it as a temporary storage space, and it can hold quite a bit of weight! Just make sure you use something really sturdy!
Update 2: 5/16/2013 - I've just discovered illustration board, and think it might be a good recommendation in place of my cardboard. It's 1/16" thick, and can be cut with an Xacto knife. I found it at Michaels in the art supplies.
August 16, 2012
When I moved, I lost the horizontal storage needed to store my jewelry box, and had to leave it behind. My jewelry lived in limbo for ages. I eventually bought hanger storage, which was great for my pins and preventing necklace snarls,
The rings were another problem. I have lots of cheapy little rings, but they were too small to take up a single pocket, and I didn't want them all jumbled up together in one. It's hard to hang rings and yet make them easy to get remove!
 So I was very excited when I first saw SellzCuteThings' DIY Ring Wall Holder Tutorial on Pinterest. Easy and cheap? EUREKA!
 I did mine a little differently, but the process is so simple that you can customize it in many ways. The foam doesn't NEED to be covered, but I wanted to see just how fancy I could make it.
The foam curlers are easy to take apart: just slide the middle bar to one side and pull the foam off. They could easily be cut to size if they don't fit perfectly in the selected box. (I tried just stringing them on ribbon, which worked, but I was afraid the rings would fall out the other side, so I had to go buy a box. I think a cardboard cereal box would have worked, but it takes us forever to finish ours and I didn't want to wait!)
I also found the pencil case at the Dollar Tree, and it was the perfect size for fitting 16 curlers at a good pressure for holding rings in place.

I used the middle bar as a stabilizer to keep keep the foam in a straight line, just ran a bead of glue down the plastic and along one edge of a curler and assemble. I measured out a piece of fabric just large enough to roll around each foam piece and glued in place.
The fabric? In my stash. Isn't it pretty? It was actually a sample upholstery fabric swatch from JoAnns - a few years ago they sold off their old swatches for a dollar or two. It does compete with the rings, though, so I would recommend using a less busy piece if you want to showcase your jewelry.

I do regret buying a see-through case. I was in an inspirational hurry, and any box the right dimensions would do so long as I could get the project done right away. I had JUST enough fabric left to disguise the otherwise messy sides, which turned out quite pretty.
The box could easily be hung if I cut a small hole in the top for ribbon. I could also probably cut the lid off, but I rather like the added security of keeping the rings inside, because I STILL can't store it flat!
So, $2 for two packs of foam curlers, $1 for the box, and I probably paid $1 for the fabric 5 years ago. I'm pleased with the end results, and now that I can see and remember what I own, I will wear my rings more often!
Note: I have REALLY small hands, my rings are a size 4, which may throw off the visual dimensions. Two foam curlers side by side measure 4.5" if you are planning your own box.
August 15, 2012

DVD Gift Wrapper
Materials:
- Hook and loop tape, 4” strip
- Fabric, two pieces, measuring 7¼” by 22”
- Matching thread
- White thread
- Coordinating Ribbon, 1 yard
- Interfacing, useful for lightweight or see-through fabrics
 |
| Diagram, body measures 7.25"x22" |
Tools:
- Sewing machine
- Ruler
- Scissors
- Quilter’s ruler
- Rotary cutter
- Point turner
- ¼” presser foot
The Layout
The diagram on the right shows the layout and dimensions for the wrapper. It’s all one piece, but can be mentally divided into three sections, the flap, the pocket back, and the pocket front.
A typical DVD case measures 7 1/2 ”x 5 ¼” x 9/16,” and I used those dimensions for this tutorial. You may have to increase the length and width slightly for double case DVDs.
 If you're using a fat quarter, be sure to double check its measurements before cutting. Different stores or clerks may cut them to a different size!
Instructions:
1. Cut two 7 ¼” x 22” pieces of fabric, either from the same fabric or two contrasting pieces.
If you plan to use interfacing, follow the package instructions to iron on the interfacing to the wrong side of one of the pieces of fabric now. Interfacing is not required, but helpful if you find you can see your DVD through the fabric layers!
If you want to sew decorations to the outside of the wrapper, do so now.
2. Align your two pieces of fabric with the right sides (the sides you want to show) together on the inside. Sew ¼” from the edges of the fabric all the way around, leaving an opening roughly 2” for turning.
I left my opening on the lower half, as marked by the orange line on the diagram above. This way you won’t see it in the final product, and it will be sewn closed when the pocket is sewn.

3. Trim diagonally across the corners to reduce bulk, (avoid cutting the stitches) and turn right side out through the opening and carefully poke out the corners. Iron.
 4. Pick one side of your piece to be the interior of your wrap. At this point I changed out my top thread to white to match the tape, but left the bobbin the original color. This way my stitches disappeared on the tape side, but weren't glaringly obvious on the red side!
Sew the ‘soft’ strip of hook and loop tape along one short edge on this side of the interior side, ¼” from the edge, and 1 ¼” from the sides. Since this is the flap that people will be touching and handling, you will want the softer piece on this end.
5. Turn the piece over to show the outer side of the wrap. To place the ‘rough’ strip of tape, measure 1 ¼” from each side, and 3 ¼” from the short edge of the piece to the long edge of the tape. Be sure that you are measuring from the edge that does NOT have the ‘soft’ tape on it. Stitch in place.
6. With right sides out, fold up the bottom half of the piece 8 7/8” and sew ¼” from the edges all the way around. Repeat with a narrow zigzag stitch for an added touch.
7. Take your yard of ribbon and align the center of it with the center of the flap. Sew the ribbon to the outside side of the flap, either following seam lines or along the edges of the ribbon. After putting a DVD inside and closing the flap, bring the ribbon ends around to the opposite side of the wrapper and tie a bow.
The wrapper is done!
Variations
You can choose to forego hook and loop tape altogether and use buttons, snaps, or ties to hold your package closed. The ribbon is a great place to tie on a nice name tag. Alternatively, if you don't want to have to tie a bow every time, you can shorten the ribbon to 15 inches and sew a small square of hook and loop tape or snaps on opposite ends of the ribbon. A premade bow or other embellishment can be attached to the top ribbon.
Having to untie the ribbon and ‘rip’ the Velcro helps to give the giftee the traditional feeling of ‘opening a present,’ rather than holding a slipcovered movie. (Let’s face it, we all love ripping paper!) The main problem with this wrapper is that it’s OBVIOUS that there’s a DVD inside. Granted, that’s the case with any wrapped DVD. The idea here is to reduce waste, not truly surprise the gift recipient. With that in mind, an empty DVD case is a great container for gift cards, cash, and small pieces of jewelry, so you can still surprise your giftee!

August 1, 2012
I've been thinking about making this tie on pincushion for a while, because I never leave enough space between my sewing machine and the edge of the table for my magnetic pinholder, and fear dumping the thing in my lap. However, my machine is surprisingly bulky, and I had a very narrow option for tying around without interfering with any dials or levers.
So, I combined it with this idea for holding cords. I made a narrow pincushion, sewing the soft half of a cut to size piece of velcro to it, and then attaching it to the machine with the Command velcro strips. My only problem was deciding where to put it! I changed my mind after making the cushion, and so it's actually a little too long for the spot, which is why there's no picture yet. I figure it'll be easy enough to move if it gets annoying, or easy to make a new pincushion if I do like the spot!
UPDATE 8/11/12: After using it for a bit, I'm not happy with the results. It's a bit wobbly on the velcro, and the last think you want is for your pincushion to move when you're trying to jab it without looking. I may have to go with the ties around the machine after all!
July 26, 2012
 |
| I only wish it had looked like this on me! |
I bought in a rush, thinking it perfect for a cruise. A summery mix of comfortable yet possibly formal, and long enough to resist those updraft winds that cause you to pull a Marilyn Monroe on the upper decks. However, I soon realized that I probably should have bought a smaller size. To be precise, I am not busty enough to fill it out. And with the double layer sheer fabric, it made it all the more obvious. The bust DROOPED. It was awful.
So, having discovered the Refashionista blog and being fascinated by both her way of looking at clothes (what else could this dress be?) and her boldness in attacking preexisting clothing with her scissors, I decided to follow her lead. I would lose the dress either way, as I was too embarrassed to wear it!
I have another sheer layered dress that I love, so I decided I would copy that directly. It's a very basic shift dress, with an elastic waistband, and I figured I could copy it with minimal problems.
 |
| Me in the dress. Not nearly as exciting. |
 |
| The boob droop is obvious here. It's definitely not me. Note how much I've shortened the straps! |
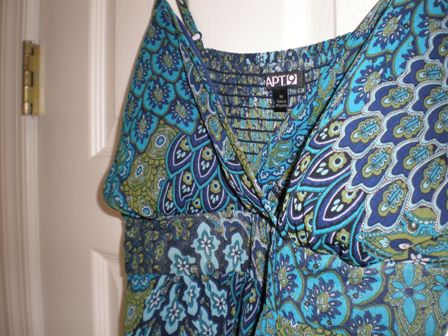 |
| Great fabric, but it droops even when i'm not in it! |
So, having discovered the Refashionista blog and being fascinated by both her way of looking at clothes (what else could this dress be?) and her boldness in attacking preexisting clothing with her scissors, I decided to follow her lead. I would lose the dress either way, as I was too embarrassed to wear it!
 |
| My inspiration dress, but not enough fabric for the sleeves. Too bad! |
Fortunately the dress was super long, so I had plenty of fabric to work with! I merely hacked off the top right under the band and carefully set to work.
I would have posted a tutorial, but totally messed up. I was trying to keep the lower half and the layers of the dress together, but that didn't work the way I was thinking. I had tried just pinning outlines of the front and back at the top, but didn't think thoroughly about turning it right side out. There's a lot of right and wrong sides in a two layer dress! Fortunately I had done minimal cutting so I was able to fix it quickly by merely folding the excess fabric over the outer edge and restitching. I'll add bias tape later on.
 |
| After: comfy summer dress! |
The amazingly obvious white elastic will be gone as soon as the darker elastic I ordered arrives, and I may look for some matching ribbon to better decorate the top (which is very basic).
I can't wait to wear it again!
I may or may not do this again. I do have a beautiful long skirt that has unfortunately developed holes near the buttons at the left hip, so I'm trying to figure out a way to fix it without destroying the style. It's brown paisley and tea length, and goes perfectly with my brown suede boots!
June 26, 2012
Frustrated by my inability to find bread in the store that's soy free, I've turned to making my own.
While meal planning and dealing with meat are not on my list of things I like to do, baking is another story. I love measuring and kneading and stirring. I have no qualms at all about foregoing the spoon and mixing dough with my bare (but clean, of course) hands. It's FUN.
Until it isn't. I found a no-knead bread recipe on Pinterest and liked the idea. Fresh baked bread always an hour away? How useful! And cheap! And better than ingesting all the added preservatives and chemicals. I know EXACTLY what goes into my bread.

So I'm giving it one last old fashioned try. I went back to the basics with this recipe and am currently waiting for it to rise. The dough is much drier and easier to handle, so I'm hoping it will be adequate to the cause. Otherwise I'm giving up on the recipe completely and moving on to other ones.
Update: Dough looks beautiful, but I managed to set the fire alarm off. So much for using metal cake pans for steam! I think the temp was a LITTLE too high for them. The house smells a little bit like the time I managed to melt the Christmas wreath.

Update 2: House now smells like warm, fresh baked bread. Bread came out absolutely perfect! Rose beautifully, nice and squishy, cooked through, crust isn't too hard or thick, and not too salty, which was a concern in the comments section. I think I will leave it in a full 25 minutes next time.
I'm really excited about this. I was getting SO frustrated trying to produce decent bread with the other recipe! Now I know it's not me or the stove!
June 18, 2012
Having gotten school and lots and lots of travelling out of the way, I am now attempting to figure out what to do with my days. I am feeling pretty befuddled and disorganized, which is very frustrating. I find myself ignoring things like laundry and vacuuming and instead fiddling with little projects like this.

I needed something to hang in the downstairs bathroom now that it's clean and accessible. Mom had offered me a selection of her and her grandmother's porcelain rose/flower collection, of which she has a large number. I finally picked out a few with the idea that I could turn it into a wall hanging.
After failing to find a wall vase or basket or the like, I finally said to myself, hey, baskets can be hung on the wall!
The best part about this piece is the price. The flowers were free or were leftovers from other projects. The basket I found at the Dollar Tree. The bottles were part of a huge mini-bottle stash I found at the thrift shop some time back for $2.00. The hanging ribbon was a $2 clearance item. The lace I had gotten off of Etsy some time back, and was pricy, but oh so pretty. I considered making a doily to go with it, but first borrowed the lace to see how it worked with the flowers. It was good enough, and I didn't have any other project in mind for that particular lace. If I do in the future I shall remake the basket! Everything is wired to the back to keep it from falling out.
My problem now? These colors go perfectly with the upstairs bathroom. However, I have no available wall space at the right height for viewing. I must resist, hang it in the bathroom it was made for, and start using that one more!
May 23, 2012
Finally got to see Williamsburg - our anniversarymoon AND graduation celebration trip. We managed to hit the perfect time - lovely weather, flowers all out, and hardly any crowds. I still need to work on my photography skills, but for now must be content in trying to 'rescue' what photos I did get.
Other than a weird blurryness in the bottom left of many of my photos, my biggest problem was I didn't want tourists in the picture. So . . . I took 'em out.
 |
| Before editing - I mostly just wanted the carriage. |
 |
| After - cropping and the rubber stamp tool removed what I didn't want. |
Yes, it's somewhat blurry, I had to be quick, plus he was moving. I figure from here I can add some sort of watercolor effect to make the blurryness seem intentional. I was lucky with this image in that the details behind the tourists were easy to figure out and fake. I can't do it with all of the photos!
In our kitchen we have a large print of the Governor's Palace, nicely balanced in the center of one wall, framed by wrought iron candleholders. I was hoping to find some smaller prints to go with it while we were down there, but nothing really appealed to me. So I've decided I would take some of my pictures, play with them to match the watercolor/impressionistic effect of the big print, and hang them on either side. I was thinking of stringing three small framed photos on a large ribbon on each side.
It wasn't until we got back and I looked at the print again that I learned for the first time that it's of the BACK of the palace. Now I'm annoyed - I never bothered to take more than a blurry photo of the front because I thought I had it already!
May 10, 2012
That's right. Everything has been turned in, and my only final exam was yesterday. (I got a 94 on it, and you should have seen all the study guides I created.) I will find out all of this semester's final grades hopefully by this weekend. It's kind of weird to realize I don't have to go to school tomorrow, or today, or ever.
One of my classes was so much fun I'm going to continue it for a bit. It was a course on the history of animation, and just as awesome as you think it would be. Every week we had to write a 500 word blog post on something, anything, related to animation. I did this over in Wordpress because professors hate Blogger for some odd reason. They claim it's due to spam commenting but I've never seen any here. *knocks on wood* I have TWO blogs at the moment. I don't really like Wordpress, so I may move the content from it to here and incorporate it into this blog. I'll have to think about it. In the meantime, here's a link if you're curious.
Animusings - thoughts on storytelling and animation.
This post is partly a test to see if I fixed my problem on my oneluckybug home site. I'm trying to get it to show previews of the blog over there, but it crashed randomly the other day and wouldn't work. We shall see.
May 6, 2012
This being my 1,000th post, I knew I would have to have something special to write about. It was only timing that would determine whether it would be about finishing college or the arrival of my niece. The niece got here first!

Born May 6 at 7:44 am
7 lbs, 10 oz, 19 inches long
Mom and daughter are doing fine.
So glad you finally joined us, Lauren!
(*Louiese is a family middle name passed down several generations, odd spelling and all. My great-grandmother had a lot of brothers who liked to call her Louis, and she felt an extra 'e' would improve the femininity.)
May 4, 2012
 Acquire ninja cookie cutters from ThinkGeek.
Acquire sugar cookie recipe.
Combine and bake. (careful, they burn easy. must be why Ninjas wear black and lurk in the dark.)
Acquire gel icing set in whatever colors you want.
Take cookies and icing to college. Show them to your friends. Sit back and prepare to laugh.

Be very amazed at their awesome, awesome results.


Can you identify these characters?
April 29, 2012
In between school assignments I have been planning out my vacation, and working once more on my travel emergency kit. Or rather, my disaster-prevention travel kit. If you've ever been on a cruise ship and discovered you needed one of these things, you are either out $10 for one item or SOL.

I should probably use generic terms for some of the items, but sometimes it's easier to use a brand instead of trying to remember whether Diphenhydramine is for your stomach or your allergies. (I'm not always good with big words.) Bonine is a motion sickness pill favored by crew members of a rather lurchy voyage my husband went on a few years ago. The stabilizers on the cruise ship were broken! Bonine does not make me sleepy the way Dramamine does. Tums may be replaced by Titralac, depending on how I end up packing things. I tried to organize my list so gels and pills were together, in the hopes that I could neatly condense the packing, in, say, a pill organizer, rather than a bunch of little bottles.
The bold letters are things I shouldn't have to replace or check to see if they need replacing. I did not include things like makeup as I was trying to not to be gender specific. I have condensed all my makeup to one little travel bag, so I can just grab THAT and go. (Let me tell you, it's hard to throw out $75 worth of makeup, even if it is 3 years old and you've only used it twice. But you feel so much better after you do.)
Now I have to figure out how to pack everything. I found a nice little plastic container at the Dollar Tree that's technically meant for food, but since you can't use it in the microwave or dishwasher it seemed rather wasted. The Dollar Tree is awesome for some of this stuff, particularly the bandaids and topical ointments. I even found an interesting little strip of cloth filled with polymer beads that supposedly keep cool when thoroughly moistened, which you tied around your neck. I figured it was worth trying at least once. They also have little tiny roller brushes about the size of your hand which function perfectly well and are easy to pack.
Yes, this is the way my mind works these days. I think I have control issues. But I do like saving the day.
April 20, 2012
 |
| I would not have shaped the room this way. |
 |
| This was the inspiration for the colors (no horizontal lines, though). |
For some reason, the room's theme just screamed 'adventure' to me. I'm not even sure if that's the right word, but I'm trying very hard to meet those needs. I'm still trying to figure that out. I want it to be unlike the rest of the house (or maybe the rest of the house more like it). It's a place to go to escape, to imagine, to relax and think about all the awesome books and National Geographic Magazines you ever read, and the exotic and wonderful places you want to someday visit. It's a place to dream your best dreams that have nothing to do with your everyday life. It doesn't matter if you do them or not, it's enough to just think about them.
 |
| This is actually the 'after' photo, added to this post later. |
.jpg)
But what else? It needs an elephant, somehow, somewhere. I need to do SOMETHING to the curtains to make them look more exciting. I'd love to be able to put stuff up in the spot above the closet, but since that requires a full size ladder to reach, I'd have to plan carefully. A parasol would be awesome, and maybe a travel trunk. I'll likely display my Steampunk library in here if I ever get it done. I do need a clock in here still, and maybe a small lantern. Maybe I can find something at Novica? Or World Market?
Adventure is just around the corner, and to the front of the house.
April 19, 2012
I love this crochet pattern, I can finish it in two evenings, or maybe 6 hours.
This one is for intended for my pending niece, so I thought I'd get all decorative on it. I tried to include decorations that were soft and (hopefully) won't pull off easily. I suppose I should test that beforehand . . .

The yarn is Simply Caron's bamboo yarn. It's SOOO very soft, and I love the color. my main complaint is that it unravels easily and you struggle to get all the tiny threads onto the hook at times. I found the pattern for the flowers here, and while I'm still mastering the magic loop (I get confused because I'm left handed, and I feel like I'm doing it backwards), I pull the beginning thread when I'm done, and pop! flower! I tried out various yarn widths and the thinner ones worked the best. The ribbon will get lots of adjusting, or maybe even removed. That's up to my sister!
April 12, 2012
My mother told me about a recipe she tried using just a box of cake mix and a 12 oz can of soda. Creativity sparked, and I decided to try it out with my microwave cake recipe and see what happened. Turned out exactly like the previous recipe! Here it is:
Microwave Soda Cake
2 TBSP flour
1.5 TBSP sugar
1/4 tsp baking powder
1/8 tsp salt
2 TBSP soda or diet soda of your choice.
Mix together and microwave for 1 minute. Surprise! Cake!

I used Fanta Strawberry soda, which explains the pinkness. If I get strawberries I might try cutting one up and adding it to the mix. I saw suggestions of using cream soda and am all about trying that next. Don't forget to sprinkle chocolate chips as frosting as soon as you take it out!
Update: If you want a moister cake, add 3 tbsps instead of 2, and microwave for 1 minute and 15-20 seconds.
April 7, 2012
Here's a link to my Steampunk Clockwork doll stop-motion animation.
http://www.youtube.com/watch?v=60tx1S9631w
March 29, 2012

The program I ended up using is called Frames. It didn't crash on me every step of the way, like Windows Movie Maker or MonkeyJam, and it didn't force me to lay every single picture on a different track, like Wax. Plus I had options to control exactly how long every frame was, and could easily apply them to each frame. The only thing this program was missing was a fade-to-black option for the transitions and an option for fading audio. They had a large range of options for exporting to video, which got me all kinds of varying results. I finally just kept playing with the expert mode until I produced a clear video with decent audio. Fortunately they offer a full feature 30 day trial, and my project is due April 10.
I think this is the most exciting thing I've ever done in college.
March 28, 2012

With the doll finished, I'm now ready to attempt to make an animation of her. This involves quite a bit of experimenting and learning new things!
The first thing, of course, was to build a 'stage.' I ended up pulling out a lightbox kit my dad had given me ages ago and discovered it was plenty big enough to use with my Obitsu. I've got a fairly good setup, if a bit plain, although I'm learning how best to use it for this project with the good old-fashioned 'make changes til it works' approach. lighting is SO difficult, yet so important with photography. I know natural sunlight is best but have no interest in adding natural elements to the chaos. Of course, it's set up in front of a big window so who knows what kind of effect that's having on it? Now that I've gotten most of the shadows out of the way I may add some props.
I also have to become a choreographer. I'm not very good at that, but I'll do my best. I need to know where I'm going to move her, and how many positions to have her in. At this point I don't really know how long it will take for her to accomplish each pose, but I'm aiming for 30 seconds to a minute of animation. I've plotted out a little dance for her to do. If it's too short I can lengthen it. I suppose, since she's a 'clockwork doll,' I can just rerun the sequence again if I need to.
I did a test run earlier, a simple spin, to see how much I need to actually move her in order to get a smooth animation. The doll has magnets in her feet and has a circular piece of metal that serves as a stand. In that stand is a small hole. I'm really not sure why, but it gives me an excellent point of reference. I drew on the 'stage' (a disused melamine bookshelf) a circle the size of the stand so that I will always know where to put the doll back to keep her in position. Around that circle I made marks, (hopefully) evenly spaced, so I could line up the hole in the stand with each mark for turns. I suppose I ought to figure out a way to keep the stand in place so I can rotate her, but this will work for now. The pencil marks are not visible on the stage. The full spin appears to take 2 seconds at 24 frames per second.
I have got SO many photos on my hard drive right now, and I haven't started on the main project yet!
March 21, 2012
I think I've got everything on her that I wanted, except maybe the key. It's really not that important.
I need to get lots of lighting lighting, find the tripod, and make a checklist of things I need to look at before taking a photo, like the tendency of her skirt to poof up on the one side, or of her corset to slide down. Overall I'm pleased with how she looks. It was not at ALL what I envisioned when I bought my Obitsu, but she definitely has charm.


Subscribe to:
Posts (Atom)