RSS Feed


June 5, 2013
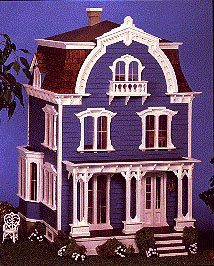
On to my current and most time consuming obsession: the Willowcrest dollhouse, by Greenleaf. It's not available on their web site, but it looks like Hobby Builders Supply has it in stock.

This was my high school graduation gift from my parents way back in 1997. (I got luggage for my 18th birthday and a house for graduation. Was this a hint?)
I picked this particular style for two reasons. The first was that the house reminded me of trips up to Pennsylvania. There was always one section we drove through, along the river in Harrisburg, full of these Victorian houses with huge porches and tall mansard roofs. I loved that part of the drive. I figured if I was going to have a dollhouse, it was going to be in a style that I would gladly move into in real life.
The second reason was the floor plan. It was, I felt, far more realistic than most houses available. I hate the way most dollhouses are laid out. Open staircases are randomly stuck in rooms. No hallways. You have to walk through the bathroom to get to the bedroom. I was doubly spoiled by my first dollhouse, built by my great grandfather, who custom designed the house with a real life floor plan. The house is two rooms deep, accessible from front and back, with a hallway down the center and some rooms having two doors. The Willowcrest tucked the hallway and stairs behind the kitchen, where it was there in the house, but not taking up a lot of space.
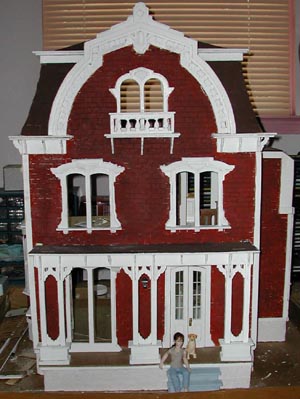 |
| That's Robin and Simon on the front porch. This was supposed to be MY house, decorated the way _I_ would do in real life, but she stole it. We're working on a compromise since we have similar interests. |
I've never been good in crafting classes, because I've been given all these materials, why can't I do what I want with them once I have them? I have a kit. It's mine. It's just a suggestion once I get the shell going!
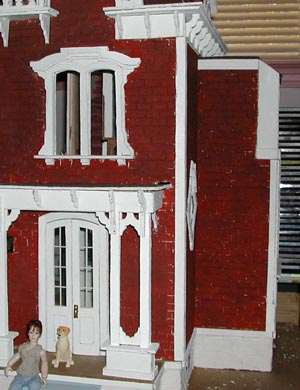 |
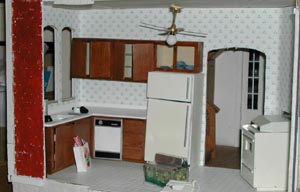
| view of the kitchen and bathroom extension from the front of the house. |
The second thing to go was the kitchen bay window. It didn't so much go AWAY as go OUT. I extended it about 3 inches so I could make both the kitchen and the upstairs bathroom bigger. They're TINY. (15 years later, I still think it's too small, even with the bump out, but I can only do so much reconstruction.)
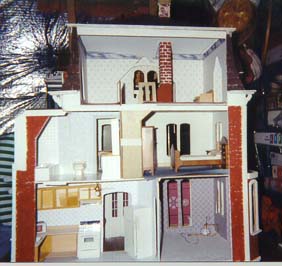
Finally, I did away with the fireplaces and the chimney. I just felt the chimney was taking up too much room in the attic. I took out the attic stairs, too, but I'm seriously reconsidering adding them back in.
 |
| My Willowcrest, circa 1998. |
I have worked on this house in stages. There is the original stage, which I believe is pictured to the left, pre chimney and stair removal, and the first incarnation of the bathroom bay window. The second incarnation has the stairs and chimney removed, and a more formal bay for the bathroom. It also included a redesign of the roof with a fancy skylight. (Hey! I just noticed the attic has a ceiling! I don't remember doing that!)
I am now in my third renovation. I have lots of plans, and I fear at the end people are going to look at it and start calling it the Pinterest House. "Hey! I saw THAT idea on Pinterest! And that! and OMG that!" Because that's pretty much where I'm getting my ideas for it.
Plans for the third renovation:
- Bay window revamp, and slight extension to level out the front of the house.
- Extension of front porch (by 4 inches so my porch swing will fit on it. The old porch was barely 3" deep. Who has a porch that's 3' deep? Even our townhouse with it's square stoop was deeper than 3'!)
- new front porch. The porch never punched out or lined up properly. It was just too much of a mess, and I figured it would be easier if I just made a new one. There's only so much wood filler can do!
- New front door. I was never quite happy with the front door. It's nice, but it's just too narrow to be a double opening door, and when I installed it, I made them open OUTWARD. I don't know why. I'm going to make the new door a single one, opening inward, with a simple stained glass window and a mail slot. I've always wanted a mail slot in my door! I may also include an old fashioned doorbell, the kind you twist to ring. My mother-in-law has one on her front door and it's so much fun. (her house is not old.)
- Electrical rewiring. Big plans here. I'd love to be able to include LEDs but I'm not sure if I can make it work yet. The premade ones are just too big, and apparently not very bright. I have to do something, though, as it looks like portions of my current system will not work. I see at least one actual tear. Toying with the idea of making everything fully functional, light switches and all. In a setup like this it's totally possible.
- New lighting. I'm thinking pendants over the kitchen sink, and ceiling lights everywhere. I may move the ceiling fan to another room. It looks like I'll be designing my own, which could be fun.
- new color scheme. I'm going for earth tones, which isn't exactly Victorian. I wish the house were Craftsman style but there's just no way I could redo it that much. There's already two layers of wallpaper in some rooms.
- new bathtub. I wish I could do a separate shower but there's just no room. I may just go super modern. We'll see what happens. With the second renovation I made a big fancy soaking tub, but after thinking about it, neither me nor Robin are likely to take lots of baths. I'm going to see if I can put in a tub but make it look like a shower stall.
- bedroom set. I have one currently for the house, but I saw this bed on Pinterest that I fell in love with and will never be able to own. You've probably seen it. It's awesome. Wait til you see my version of it!
- living room set. I bought a nice sofa and chair recently, but it's too big for the living room. Very frustrating, so I'm going to make my own. It will be bright red, to calm my red sofa desire, and probably with one of those extensions for your feet or extra guest seating. It will work. I don't know yet what I'll do with the sofa set. Maybe save it for my niece?
Right now I've gotten the bay window mostly redone, and the extension of the front porch is well underway. I also have the front door pieces cut out, but not yet decorated. I'm still slathering and smoothing wood filler in all the necessary places, and that takes forever as you have to wait for it to dry, sand, paint to see if that will fill it in nicer, and start over.
I will feel the house is mostly 'done' once I get the outside to my satisfaction. Then I can concentrate on it room by room once I get the wiring worked out. Details will be documented here!
Subscribe to:
Post Comments (Atom)
0 comments:
Post a Comment